Spicy Sausage Red Beans & Rice

There isn’t much to say about this one except that it disappears within minutes of me making a massive amount of it so make sure you sneak a few servings & hide it in the fridge before you feed your family to ensure that you get some!

Spicy Sausage Red Beans & Rice

1 (16 oz) package smoked sausage, sliced
1/2 yellow or sweet onion
2 tablespoons olive oil
1 (10 oz) can of Rotel
*NOTE: my family likes it with a little kick so I use “Mexican” Rotel. If you’re a pansy, feel free to use the Original : P
2 teaspoons Tony’s Creole Seasoning (it’s the BEST
1 (15 oz) can light or dark red kidney beans, rinsed & drained

Rice:
2 cups jasmine rice
3 cups water
2 chicken bouillon cubes
(I prepare mine in a rice cooker)-best invention ever

20130402-154352.jpg

If you have yet to try this stuff, you are seriously missing out. I put it on EVERYTHING. Amazing.

20130402-155545.jpg

First, slice the sausage & onion.

20130402-154439.jpg

In a large skillet or wok, add 2 tablespoons of olive oil & toss in the sausage & onion. Cook over medium heat until the sausage is browned & the onions are a more transparent & drain of any extra oil or grease. Set aside.

20130402-154648.jpg

While the meat & onion are browning, cook the rice with water & chicken bouillon cubes in a rice cooker.

Add the can of Rotel (do NOT drain) to the sausage & onion in or skillet or wok. Mix it well & simmer, 5-7 minutes.

Drain & rinse red beans & add those & the cooked rice (i use most of what i make, but you can adjust the amount used to your liking) to the sausage mixture.

20130402-155206.jpg

Now, add this amazing creole seasoning.

20130402-155246.jpg

Mix well & then simmer 10-15 minutes or until heated through.

I usually serve this with roasted lemon parmesan asparagus. It is DELICIOUS!

20130402-155410.jpg

Posted in Main Dish Recipes, Uncategorized | Leave a comment

Hillbilly Shepherd’s Pie-another, quite different original

This is a never-fail kind of thing.
There are about 10 meals that are completely shelf-stable that I keep on hand for those nights that I either don’t have my typical amount of fresh produce (like the few days leading up to my bi-weekly mapped out grocery trips) or I have too much to do to cook immediately before serving dinner.

My lovely stepdaughter & I will be FAR too busy working on her Walt Disney book report project tonight to even think about cooking or cleaning. I just love having things all nice, neat, & taken care of!

You can make this up ahead of time (even the night before) & just pop it into the oven & done.

A small forewarning,:this one is a little out there, for you people who aren’t keen on trying new things. I know it looks funny, & it sounds totally ‘red neck’ but my family loves it.

I greatly adapted this one from a dish my sister wife made that my husband called “heart attack hash” when she delivered a helping to us. (It consisted of ground chuck, cream of <something) soup, tots, & an abundance of cheese)

Hillbilly Shepherd's Pie

1 (32 oz) bag of frozen tater tots
1 can cream of mushroom soup
1 pound ground beef, browned, drained, & seasoned with Lowry's seasoning salt & Tony's creole seasoning to taste
1 small bag of frozen mixed vegetables
1/2 onion, diced & sautéed
1 cup shredded Mexican cheese blend

20130402-151632.jpg

What a collection of ingredients, right? I feel like I might need to turn on a NASCAR race or maybe an episode of Duck Dynasty to make this completely appropriate.

First, season, brown & drain your meat & place the meat into the bottom of a 9×13 glass casserole dish.

20130402-151807.jpg

Next, use that skillet to sauté the onions that you’ve just chopped.

20130402-151928.jpg

Sprinkle the onions over the meat in your casserole dish.

20130402-152005.jpg

Next, top this with the bag of frozen vegetables.

20130402-152037.jpg

Use a spatula to spread the can of cream of mushroom soup over the vegetables.

20130402-152115.jpg

Sprinkle 1/2 cup of the shredded cheese over the vegetable/soup layer.

20130402-185057.jpg

Then, cover by arranging frozen tater tots very closely together to create a hillbilly-style potato crust that are consistent with in shepherd’s pies.

20130402-185309.jpg

Bake in the oven on 375 for 40-45 minutes. Remove it from the oven & top with the remaining shredded cheese & place back in the oven just until melted, about 2-5 minutes.

20130402-185454.jpg

Now turn on an episode of Duck Dynasty & eat it in the recliner, with a little bit of ketchup if you’re feeling especially ‘hillbilly’. 😉

20130402-185634.jpg

You’re welcome. (I think) 😉

-Mrs. B

Posted in Main Dish Recipes, Uncategorized | Leave a comment

Mrs. Bird’s Famous Apple Crisp..you do NOT want to skip this one..

Ok, so I am about to do you a serious service in this post today.

I know that I have been procrastinating.

Believe me, the photos of dishes etc are piling up. I have about 15 things in the works that just need to be typed out & posted as of now. I promise I have been keeping up my end of the bargain with my family, I am just slow at sharing them with you.

{my sincerest apologies}

After reading & trying this one, I have much confidence that you will forgive me.

& hopefully so will my sister, who I was supposed to send the recipe to months ago for her to make it for a company party…i can’t come up with a better excuse than the fact that I hadn’t yet written the full recipe out yet. I do this one mostly by memory.

I don’t typically give away many of my sweets recipes since I sell them, but this one is just too good to keep to myself. I have been making this dessert for a decade now (since i was 14 years old) & have been experimenting & working on changing & adjusting this recipe for just that long. I think it is finally ready to be unleashed on the world.

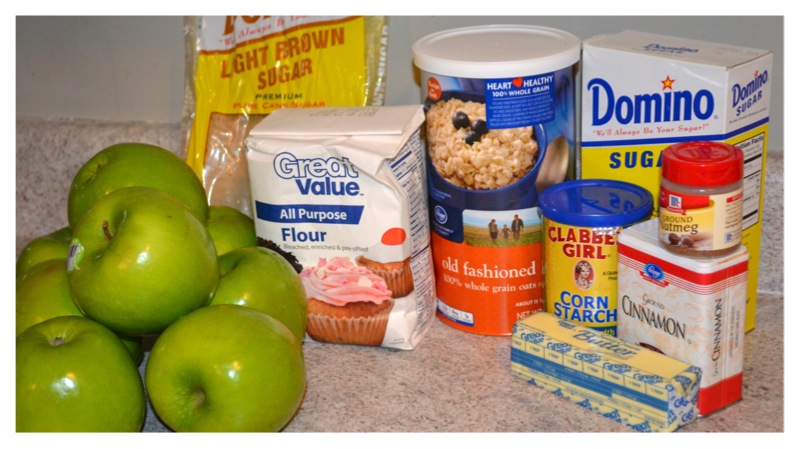
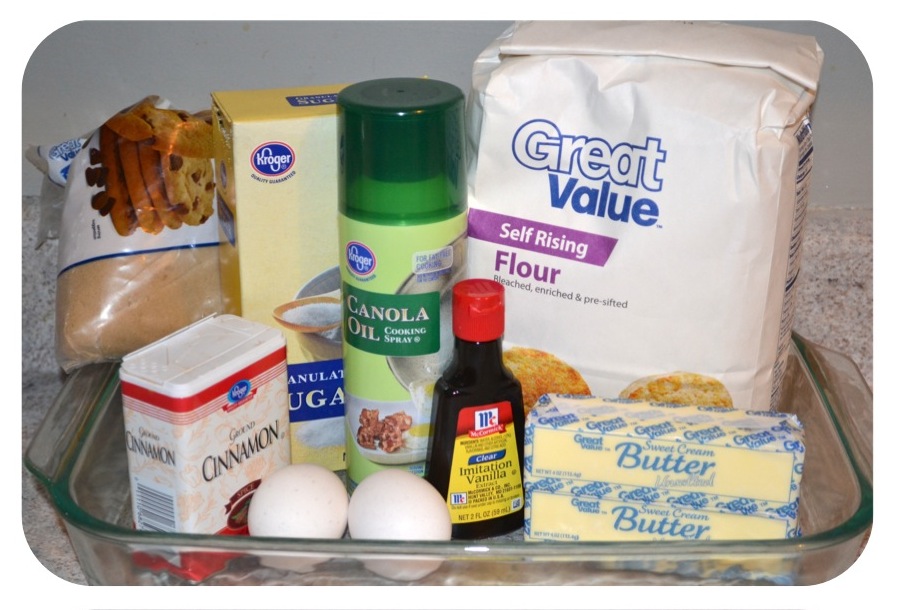
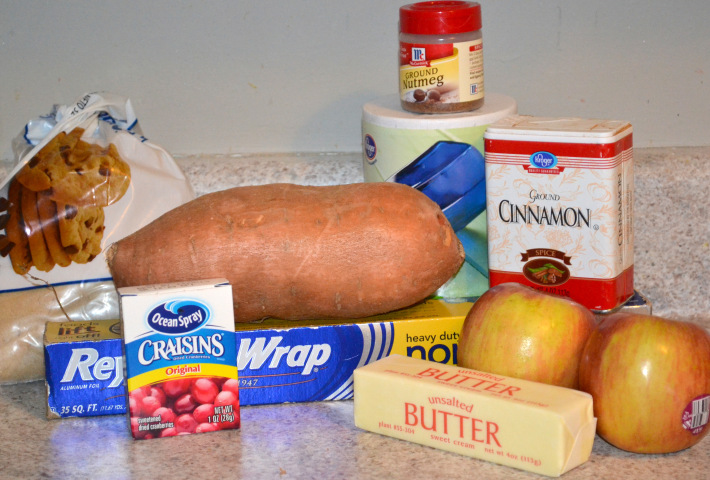
Mrs. Bird’s Apple Crisp

Filling:

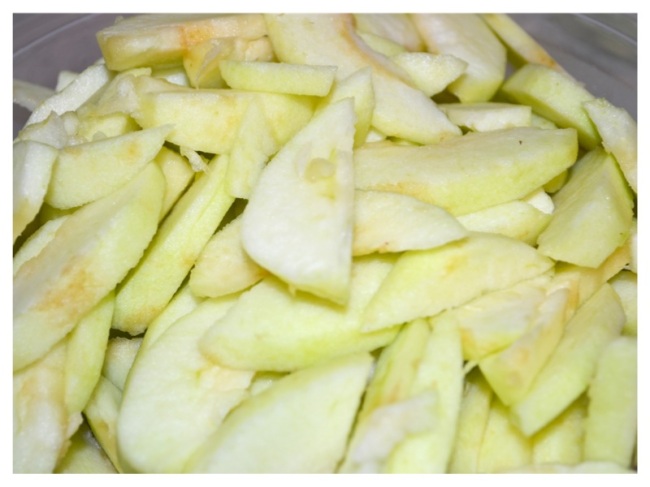
8  Granny Smith apples, peeled, pared, & sliced thinly

1 cup of sugar

1 cup of brown sugar

1 teaspoon cinnamon

3+3 tablespoons of cornstarch, divided

Crust:

1 1/3 cups of brown sugar

1 cups of flour

1 1/3 cup of dry oats

1 1/2 teaspoons nutmeg

1 1/2 teaspoons cinnamon

2/3 cup of butter, softened

Image

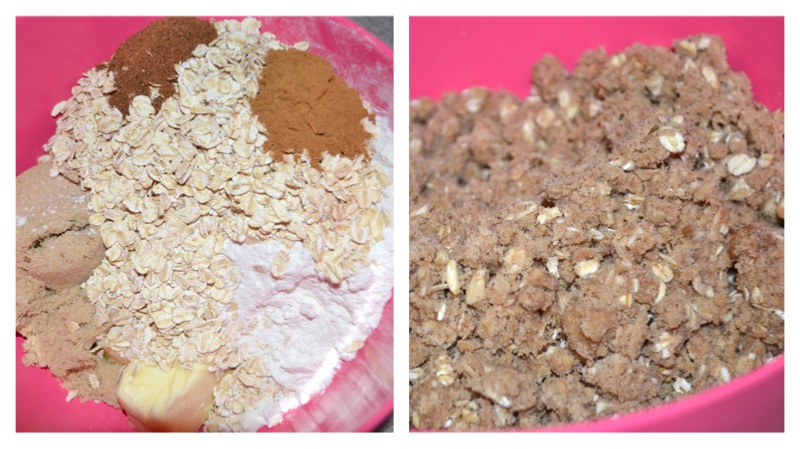
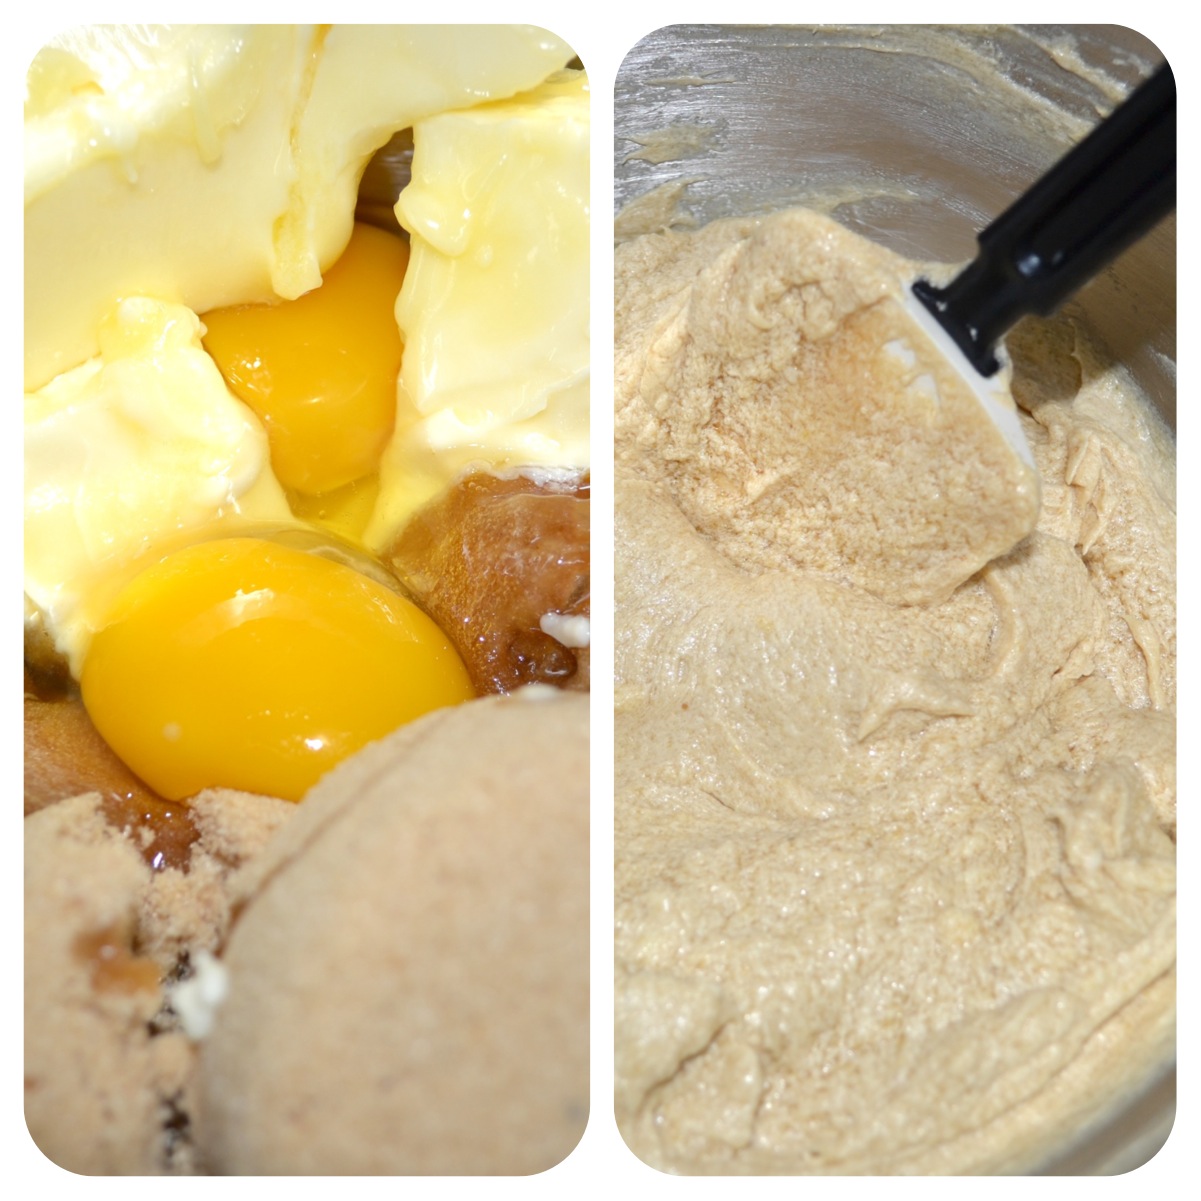
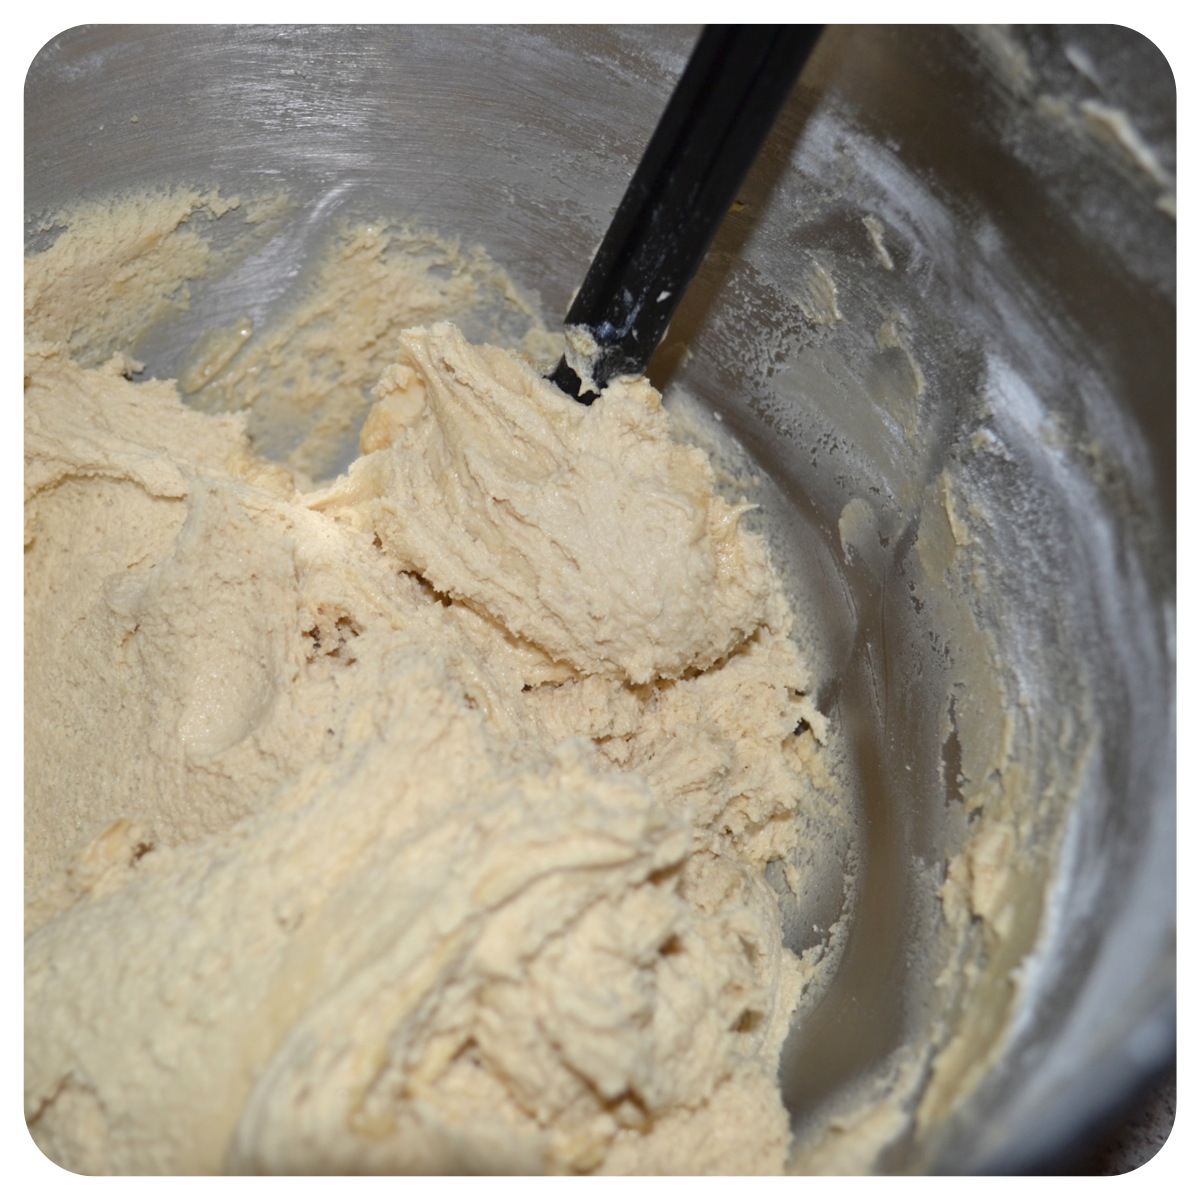
First, lets take care of the crust portion.

Place 1 1/3 cup brown sugar, 1 cup of all-purpose flour, 1 1/3 cup dry oats, 1 1/2 teaspoon nutmeg, 1 1/2 teaspoon cinnamon, & 2/3 cup butter in a large bowl. Note to self: you will get one hand pretty messy, while mixing this up.

Image

Thats right, use one hand to mix these ingredients until thoroughly combined & set aside.

Now onto the filling.

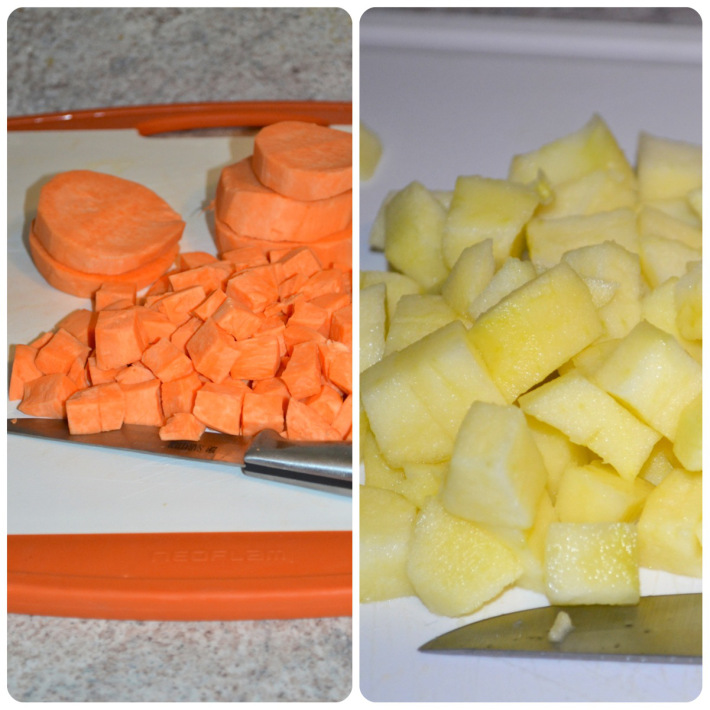
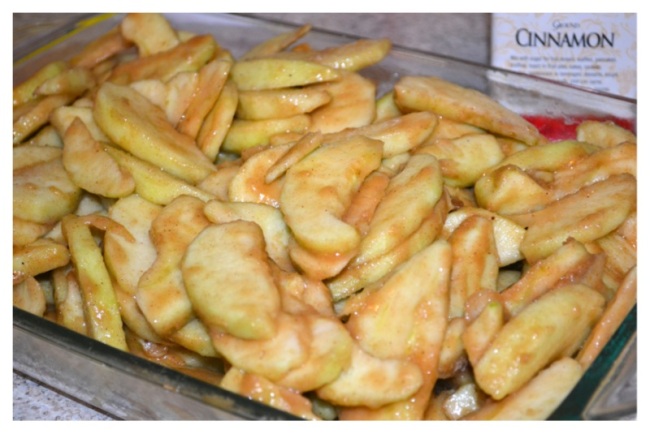
Peel, core, & slice apples thinly.

Image

Next, mix up the dry ingredients that are included in the filling

(leaving out 3 of the 6 tablespoons of cornstarch needed)

Mix 1 cup of sugar, 1 cup of brown sugar, 1 teaspoon of cinnamon, & 3 tablespoons of cornstarch until combined in a medium-sized bowl.

Place half of this dry mixture in a gallon ziplock bag & then add half of the sliced apples.

Image

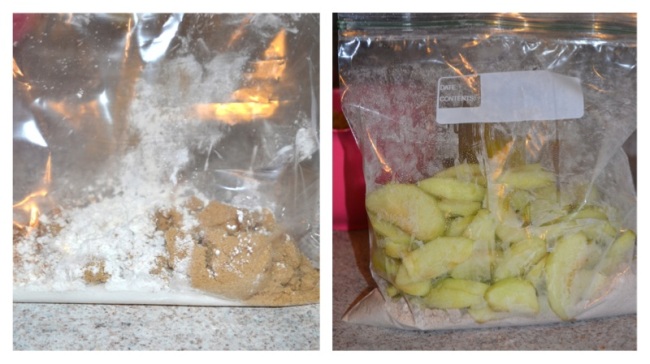
Seal and shake the bag to coat the apples.

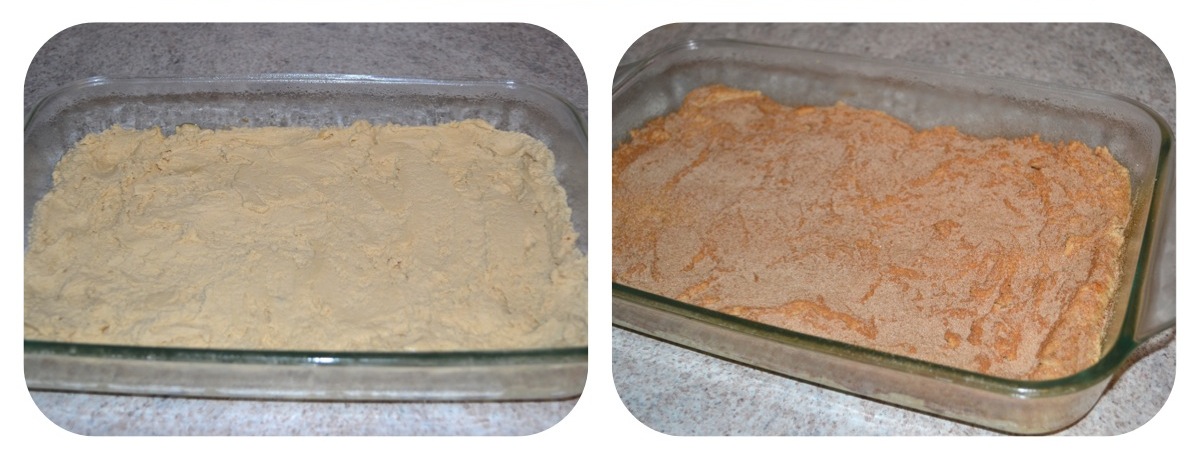
When combined, place the contents of this bag into a greased 9×13 glass dish.

Repeat this step with the rest of the apples & dry ingredients.

Place the rest of the coated apples in that 9X13 dish.

Image

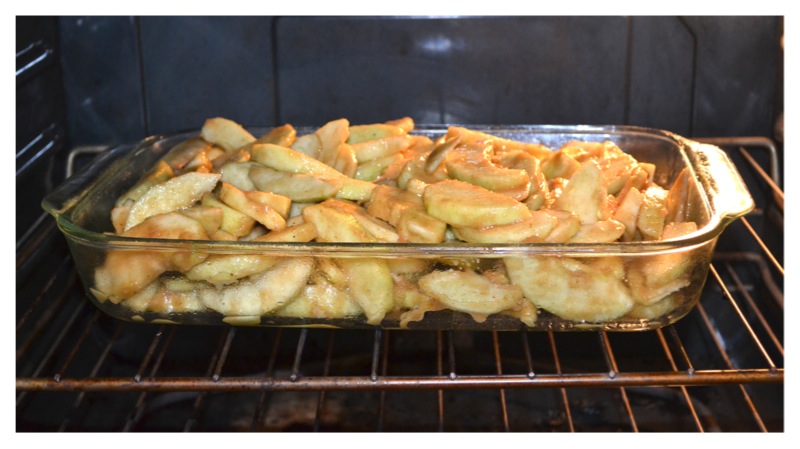
Next, place the dish in the oven & bake uncovered @ 375 for 15 minutes to soften apples.

Image

After removing from the oven, there will be liquid in the pan that has baked out of the apples. Mix the remaining corn starch (3 tablespoons) with a small amount of this liquid to make a roux in a small bowl. Add a more of the watery liquid from the baking dish to the roux slowly, until it has thinned out, stirring after each liquid addition. Pour the roux back in to the baking dish with the apples & mix gently until it is well incorporated.

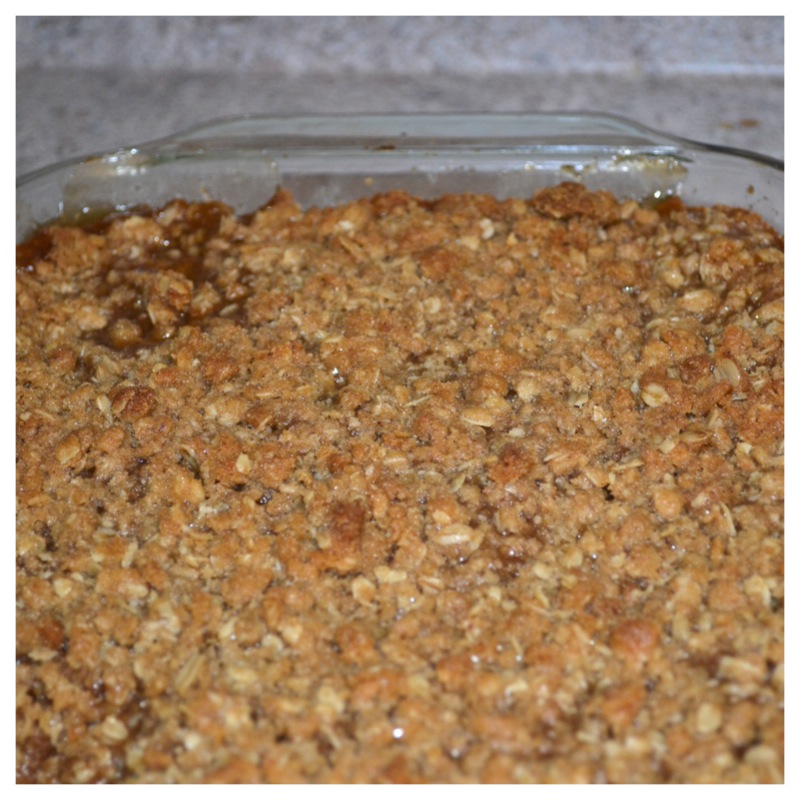
Crumble the brown sugar oat topping over the apples until you’ve used it all.

Image

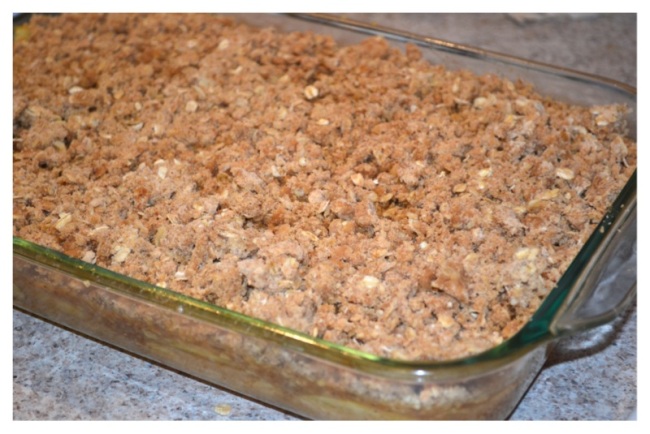
Replace back into the oven, uncovered, and bake about 30 minutes, or until the apples are tender & the crust is golden brown.

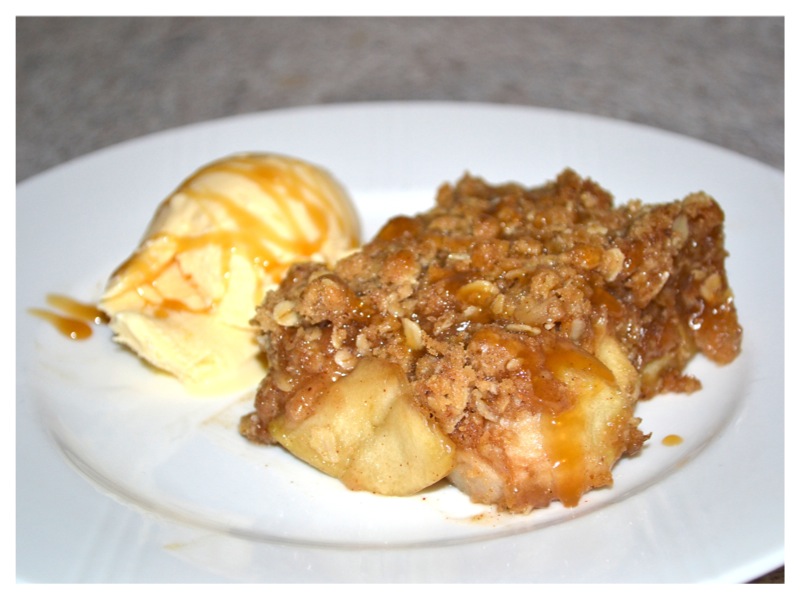
This is your finished product:

Image

This is what it should look like when you serve it.

Image

It is a very ‘southern’ dish of me. & my family likes it served with caramel sauce & vanilla ice cream.

Eating this hot concoction with some cold ice cream is one of my favorite things to do.

It really just doesn’t get any better than this.

-Mrs. B

Posted in Dessert Recipes, Uncategorized | Leave a comment

Soup Season is Not Over!

Yes, Spring is approaching (ever so slowly) but the weather in Memphis has been confusing me…& my sinuses lately. People have been griping about this unusually cold weather & instead of complaining with them, I am going to seize this opportunity & use it as an excuse to make one of my favorite things in the world to eat.

.Soup.

I have been a soup FREAK all of my life (although I come from a place where no one wants to eat soup in that climate).
All of my Indiana & St. Louis friends should appreciate this one & it’s timing while they’re snowed in this week.

This is an Ashton Bird original. & a very simple one at that. My family requests it even in our unbearable Memphis summer. That’s how I know you should give this one a shot.

Mrs. Bird’s Taco Soup

what you’ll need:

Soup:
1 pound of ground beef
1 small onion, diced
1 green bell pepper, diced
1 can whole kernel corn (do not drain)
1 can Mexican Rotel (do not drain)
1 can diced tomatoes (do not drain)
1 can Cannellini kidney beans (rinse & drain)
1 (29 oz) can Hunt’s tomato sauce
1 envelope Taco Seasoning
6 beef bouillon cubes
5 cups of water

Toppings:
Sour cream (you can substitute with Greek yogurt like we do)
Mexican blend shredded cheese
Fritos or tortilla chips

Your ingredients should look like this. Add a can of corn to that.(I had to run to the store mid-cooking)

20130327-181754.jpg

First, wash, dice & sauté the onion & pepper in a spot of olive oil on medium high until they soften up a bit, about 6 minutes. Add the ground beef to the sautéed vegetables & brown. Drain any liquid off, after it is cooked through.

20130327-182032.jpg

Feel free to season the mixture with this stuff while its cooking for a little extra flavor.

20130327-182314.jpg

Next, add to the huge soup pot your meat & sautéed veggies are in, the rest of the ingredients plus the water.

*Be sure to rinse & drain the Cannellini beans. Don’t drain any of the other ingredients!

20130328-002543.jpg

Heat your soup to a boil & reduce to medium low. Cover & let it simmer20-30 minutes, allowing the flavors to combine, stirring occasionally.

Top with a dollop of sour cream or greek yogurt, shredded cheese, & fritos to serve.

20130328-002718.jpg

-Mrs. B

Posted in Soup, Chili & Stew Recipes, Uncategorized | Leave a comment

A Short & Sweet Guilt-Free Snack

I wouldn’t even call this a “recipe”; more like a simple set of guidelines. You just need taste buds to appreciate the end result. & a bunch of bananas.

Bananas would help too. : P

I’ve seen the substitution with bananas in frozen treats everywhere lately & it is a fabulous one I came across, indeed. I have a toddler running around who, if i allowed him, would probably eat nothing more than ice cream forever more so this was right up his alley. My freezer is now full of frozen bananas for smoothies & for (my good intentions) to make banana bread. They always seem to fall short & I wait until it’s too late to use them so I’ve resolved to just start freezing them. I hate being wasteful.

My mother seems obsessed with buying me bundles & bundles of bananas. I take them without question & this week was no different. I just find myself looking for different ways to consume these things by the masses. & this is a very tasty way. Whether to satisfy my toddlers need for a treat, or mine or my husbands sweet tooth late at night. I have to say, I feel a little less guilty. : P

Chocolate Covered Frozen Banana Bites

•about 4 bananas
•peanut butter (I used crunchy)
•melting chocolate OR the combination of semi-sweet chocolate chips & shortening
•wax paper
•freezer

The pictures are fairly self explanatory.

20130314-134746.jpg

Slice bananas & top with a little creamy or crunchy peanut butter, whichever you prefer.

Freeze ’em overnight.

Melt your chocolate & dip to cover them! If the chocolate doesn’t stick to the bottoms of the bananas, that’s ok, just let them harden as they are & when they are solid, pick them back up & using a spoon, cover just the bottom with a little chocolate & rest them back on the wax paper you’re using.

VOILÀ!

20130314-140208.jpg

Store them in the freezer & munch on these babies anytime, day or night…& remember to share them with your toddlers : P

-Mrs. B

Posted in Dessert Recipes, Uncategorized | Leave a comment

Quick Chicken

My back is aching. I don’t want to stand over the stove but I need to feed my hubby’s brain (who is taking a very hard exam he’s been studying for, for 6 months in a couple of days). With this mentality in mind, this easy gem won for the menu tonight; & I’ll definitely be putting this one into the normal ‘rotation’.
Full of flavor & great balance for a fresh veggie side & yeast rolls! YUMO!

Crunchy Ranch Baked Chicken

3-4 raw chicken breasts (marinated in concentrated chicken bouillon, Tony’s seasoning, 1/4 cup vegetable oil, & herb poultry season)
2 tablespoons of ranch dressing mix
1/2 cup of plain greek yogurt (substituted for mayo or sour cream)
1/4 cup of shredded 4-cheese blend
1/3 cup of Panko crumbs
cooking spray

20130313-211017.jpg

I know that I have mayo pictured & that is only because it’s all that I had when making this dish. I wanted to use greek yogurt in this recipe instead & next time, I definitely will. In my opinion, mayonnaise has too strong of a taste to use in this recipe.

First, after trimming your chicken breasts of all obvious fat, marinate them in some concentrated chicken bouillon, Tony’s Cajun seasoning, oil, & poultry herbs. Chill at least 15 minutes before proceeding. (You of course can omit this step if you aren’t marinade-obsessed the way I am.)

After they were nice & flavorful, I placed the breasts on the bottom of a lightly greased corningware dish.

20130313-211655.jpg

In a small bowl, mix the greek yogurt (or in this one case, mayo), cheese, & ranch seasoning together until blended.

20130313-211830.jpg

Spread this mixture evenly over your chicken. It smells delicious but it’s a little early yet to try. 😉

20130313-211943.jpg

Top this with the panko bread crumbs & lightly spray with your non-stick cooking spray.

Slide this into the oven on 350 for about 25 minutes or until the panko is a golden color & the chicken is cooked through.

20130313-212158.jpg

It is DELICIOUS! Even picky toddler approved. It’s super easy too. I didn’t have to run out to the grocery to come up with the ingredients for this. It was an impromptu ‘I-don’t-really-feel-like-cooking-but-I-don’t-want-anyone-to-starve’ meal. Safe to say everyone was more than satisfied. Eat up!

-Mrs. B

Posted in Main Dish Recipes, Uncategorized | Leave a comment

Creamy Italian Goodness in a Crock Pot!

No frills to this post. Just the recipe. I’m getting down to business today; got a lot on my list to do!

P.S. this one is in the crock pot RIGHT.NOW!

Zesty Italian Chicken Rotini

What you’ll need:

20130228-133044.jpg

4 boneless, skinless chicken breasts
1 envelope of Zesty Italian Dressing Seasoning
1 block of cream cheese (8 oz)
1 can of cream of chicken soup
1 can of cream of mushroom soup
1 box of rotini pasta
2 teaspoon garlic powder
1/2 teaspoon minced garlic
1 onion, sliced
4 ounces of baby bella mushrooms, sliced
Parmesan cheese, shredded to top

What to do next:

After gathering your ingredients, place the two cans of soup in a saucepan along with the minced garlic, garlic powder, & block of cream cheese (which you will want to cut into slices so that it softens quickly) in a saucepan.

20130228-184521.jpg

Heat on low-medium until the mixture is smooth & creamy.

Place the chicken breasts-that i just KNOW you have season/marinated in some “better than bouillion”, minced garlic, & herbed poultry seasoning for at least a 30 minutes-in the bottom of your crock pot & top with the envelope of dressing seasoning.
(If you did marinate in a liquid, you will definitely want to discard this liquid before adding the chicken breasts to your crock pot.)

20130228-184723.jpg

Pour the cream mixture on top of the chicken. Cook on low for 4-5 hours.

About 15 minutes before you’re ready to serve, boil the rotini al dente & drain.

20130228-184937.jpg

Next, slice up your delicious bella mushrooms & onion (& try not to cry). It never fails, I always do.

20130228-185133.jpg

Season these with Lowry’s seasoning salt & some minced garlic. Sautée them in a little bit of olive oil until they’re caramelized.

Add your pasta to the chicken & cream sauce in the crock pot & stir until combined. Garnish the pasta with your sautéed vegetables. Lastly, add some shredded parmesan cheese to complete your dish.

20130228-185356.jpg

Truly a quick & easy one for even the busiest or most novice cook. (like me, today) Bon appetit 🙂

-Mrs. B

Posted in Uncategorized | Leave a comment

Another Sweet Tooth

….it’s relentless around here. It’s unavoidable, so typically I just give in to it.

(In moderation, of course).

The sweet tooth has struck again & I’ve got just the dessert to conquer it.

I’m a snickerdoodle fanatic & I think it has rubbed off on my husband because when I verbally went through a list with him of new sweets I wanted to test out, as soon as i got, “snicker-….” out of my mouth, he declared that one the winner for today.

So here we go. I hope you’re ready.

Snickerdoodle Blondies

2 & 2/3 cups all-purpose flour

2 teaspoons baking powder

1 teaspoon salt

2 cups packed brown sugar

1 cup of butter, room temperature

2 eggs, room temperature

1 tablespoon vanilla

2 tablespoon sugar

2 teaspoons ground cinnamon

DSC_0365

If you’re anything like me, your cabinet will already be stocked with these fine things. Those are my favorite sweets to make. The ones i don’t have to go on a grocery store hunt to complete.

DSC_0371

First, whisk to combine flour, salt, & baking powder. (These 3 ingredients can easily be substituted by using self-rising flour, which i almost always do.

DSC_0369

Next, add the butter, eggs, brown sugar, and vanilla to your mixing bowl and beat until smooth.

Add your flour mixture gradually until well combined & it looks about like this.

The stuff is pretty thick, like cookie dough.

DSC_0373

Evenly spread into a greased glass 9×13 casserole dish.

Mix together cinnamon & sugar in a small bowl & sprinkle over dough to cover.

snickerdoodle

Bake in the oven on 350 for 25-30 minutes, or until the surface bounces back when lightly pressed.

Let these babies cool, cut them into squares & serve them up with vanilla ice cream, coffee, or a cold glass of milk! Trust me, they won’t last long.

DSC_0384

-Mrs. B

Posted in Dessert Recipes | Leave a comment

On Game Day Around Here, Its All About the BALLS!

I am famous…or maybe infamous… for my party meatballs. It’s a never fail kind of thing. So naturally with game day yesterday, I whipped up a half batch for our company. It is so simple, its embarrassing but Lord, are they addicting.

Schweddy Balls

(feel free to rename these more appropriately. This one just STUCK for us)

credit to Charley Sheen & SNL

80-100 frozen meatballs

two 12 ounce jars of Heinz chili sauce

one 32 ounce jar of grape jelly

2 teaspoons of lemon juice

2 teaspoons of soy sauce

2 tablespoons of brown sugar

schweddy-balls-ingredients

Note: be on the lookout for one strange ingredient & don’t dismiss it. You’ll be missing out severely! I didn’t take pictures of my ingredient line-up so I compiled a collage for you instead.

Excuse the blurry meatballs. This was the only picture i came across & it just so happens to be awfully blurry. I insisted on showing this one because these Costco brand meatballs are my favorite to use. Another great way to use this sauce recipe is on “lil smokies” instead of meatballs. Both are equally delicious.

You can take this adventure one of two ways: on the stove or in your favorite crock pot. I usually just do mine on the stove but the choice is yours.

Either way, you will want to combine all the sauce ingredients (excluding the meatballs) to your crock/pot. Heat until boiling & combined into a smooth sauce.

Now you can add your meatballs! Stir to coat them & if you’re using the stove, simmer on medium low, stirring occasionally until cooked through. Using the crock pot, you will stir to coat & cook them on high for 2 hours or so until heated through.

Voila! It’s over. How easy was that? Now here’s your reward. (Forgive them for not being terribly photogenic)

balls

In all seriousness though, this party food is a winner. Period.

Usually I serve my left over meatballs over white rice with fresh stir fried french beans, onions, & colorful bell peppers. This is also delicious if you want to cut the recipe in quarters & make it as a meal instead of a party hor d’oeuvre.

Enjoy!

-Mrs. B

Posted in Appetizer Recipes | Leave a comment

A “Skinny Girl’s” Sweet Tooth

This one got raves last night even from my toddler (who is definitely my toughest critic by far). The best part about it, is that it is a SUPER easy and very forgiving recipe.

Cinnamon Baked Sweet Potato & Apples

1 very large (or 2 medium sized) sweet potatoes, peeled into bite sized pieces

2 Fuji apples, cored, peeled, & cut into bite size pieces

3 tablespoons of light butter or spread

3 tablespoons of brown sugar

1/2 teaspoon cinnamon, or more to taste

1/4 teaspoon salt

dash of nutmeg

4 tablespoons of craisins

Gather your ingredients first, as we always do!

dsc_03691

Peel, core, and dice your fruit & veggie.

edited-potato

Next, you need to find yourself a cookie sheet and some heavy duty aluminum foil. Place one piece of the foil on the cookie sheet to cover it. Grease it up with some non-stick cooking spray. Then sprinkle your fruit & veggie pieces out on the foil. Top with your craisins. Slice the butter into thin pats & place them on top. Sprinkle the brown sugar, cinnamon, salt, & nutmeg to finish. It looks delicious already!

dsc_0373

Take a second piece of foil, lay it over the top and make sure the edges all the way around are sealed.

dsc_0374

Bake it for 30-35 minutes or until the potato & apples are tender. Note that while it bakes, the apples will release a little juice so be careful taking it out of the oven, in case some of it seeps out!

dsc_0375

YUM! This stuff smells and looks amazing!….& it tastes even better. Its good for a light side that conquers that sweet tooth. The craizins is a crucial ingredient here for me too. The sourness of them balance out the sweetness of the rest of it. Simply delicious. This is also considered a “Skinny” recipe too. It makes 4 side servings.

I paired this side with something I call “smothered chicken” & “something chicken” that I made with chicken thighs marinated in “Mr. Yoshida” (i cook with this A LOT). You can find it at Costco.

For the smothered chicken (for my husband, an onion enthusiast), I sauteed some onions & baby bella mushrooms in olive oil and fresh garlic to cover the chicken, & topped them with a slice of provolone.

For my “something chicken”, I topped my chicken breast with a little barbecue sauce, thinly sliced honey ham, and colby & monterey jack cheese blend. Fantastic! Note that I usually let my chicken bake for about 18 minutes before putting the veggies & cheese on top so it stays nice & gooey.

dsc_0377

I mean, really, does that not look absolutely delicious?! Hope you enjoy! **& i know that sweet vegetables for some people is quite an oddity that they don’t prefer but try it; you might surprise yourself!

-Mrs. B

Posted in Side Dish Recipes | 1 Comment